If you’re a Water Safety Instructor (WSI) with the Red Cross, you know how crucial it is to deliver effective, engaging, and standardized swimming lessons. It’s not just about teaching strokes; it’s about imparting life-saving skills and building confidence in the water. Planning is the bedrock of successful instruction, ensuring every minute in the pool is productive and aligned with Red Cross principles.
But let’s be honest, creating a comprehensive lesson plan from scratch for every single class can be incredibly time-consuming. You’re juggling multiple levels, different age groups, and varying skill sets. This is where a well-structured lesson plan template becomes an invaluable tool, transforming your preparation process from a daunting task into a streamlined, efficient routine.
The Core of Effective Water Safety Instruction
A robust lesson plan isn’t merely a checklist; it’s a dynamic guide that ensures consistency, professionalism, and most importantly, student progress. For Red Cross WSIs, it means adhering to the rigorous standards and objectives set by the organization, guaranteeing that all participants receive the same high-quality instruction regardless of who is teaching. Think of it as your roadmap to a successful aquatic journey for your students.
Having a clear structure frees you up to focus on the nuances of teaching – adapting to individual student needs, offering personalized feedback, and managing your class dynamically. Without it, lessons can drift, key objectives might be missed, and both instructors and students can feel a lack of direction. It provides a framework that supports both novice and experienced instructors in delivering their best.
Key Elements of a Powerful WSI Lesson Plan
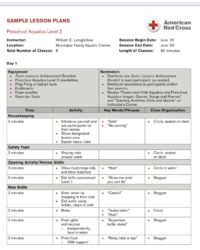
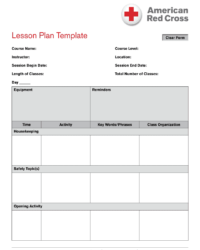
What makes a lesson plan truly effective for water safety instruction? It’s the thoughtful inclusion of specific components that guide both the instructor and the learner through a logical progression of skills. These elements ensure that every session builds upon the last and addresses the necessary competencies:
- Clear Objectives: What specific skills or knowledge should students master by the end of the lesson?
- Materials and Equipment: A list of everything you’ll need, from kickboards to rescue tubes.
- Time Allocation: How long will each activity take? This helps with pacing and ensures all objectives are covered.
- Teaching Cues and Demonstrations: Notes on effective ways to explain and show skills.
- Safety Considerations: Specific reminders for each activity to maintain a secure environment.
- Assessment Strategies: How will you evaluate student understanding and skill acquisition?
- Transitions: How will you smoothly move from one activity to the next?
- Review and Preview: Recapping previous lessons and introducing what’s coming next.
Flexibility and Adaptation in Your Plan
Moreover, an excellent red cross wsi lesson plan template should allow for flexibility. While consistency in standards is vital, every class is unique. You’ll encounter different energy levels, prior experiences, and learning styles among your students. A good template provides the backbone, but you, as the instructor, are the one who breathes life into it, adjusting activities and explanations on the fly to meet the immediate needs of your students. This adaptability is what truly differentiates a masterful instructor and ensures that the lesson plan serves as a living document rather than a rigid script.
Crafting Your Personalized WSI Lesson Plan System
While you might be looking for a ready-made red cross wsi lesson plan template, consider the benefits of developing your own, or at least heavily customizing one. This process allows you to embed your personal teaching style, specific facility requirements, and the unique challenges you face with your typical student demographics. It’s an investment in your teaching efficiency and effectiveness.
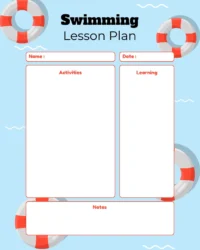
Start by outlining the general structure and then fill in the specifics for different levels or courses. Think about the progression from beginner to advanced skills, and how each lesson contributes to the larger curriculum goals. Don’t be afraid to experiment with different formats until you find what works best for you and your students. Collaboration with other WSIs can also provide valuable insights and practical tips for creating a shared pool of resources.
When you’re ready to put your template to use, remember that the true power lies in its consistent application and refinement. Here are some pointers to maximize its impact:
- Pre-Lesson Review: Always review your plan thoroughly before class, visualizing the flow.
- Post-Lesson Reflection: After each class, make notes on what went well, what could be improved, and any unexpected challenges.
- Iterative Improvement: Use your reflections to tweak and refine your template over time, making it even more effective.
- Emergency Preparedness: Integrate specific emergency action plan reminders relevant to each activity.
- Engagement Boosters: Add notes for games or activities that can re-energize the class if needed.
By engaging in this iterative process, your lesson plan template transforms from a static document into a living, evolving tool that constantly improves your instructional delivery. It ensures that you’re always prepared, always aligned with Red Cross standards, and always ready to provide the best possible learning experience for every swimmer.
Ultimately, a well-thought-out lesson plan empowers you to be a more confident and impactful Water Safety Instructor. It reduces pre-class stress, allows for better time management in the pool, and most importantly, leads to more successful learning outcomes for your students. The effort you put into planning directly correlates with the progress your students achieve, making every minute count.


